
During Writing
Visual Accessibility: Using Alt Text
Gia Alexander; Heather Caprette; Amanda Coolidge; Sue Doner; Amanda Goodsett; Josie Gray; Barbara Loomis; Tara Robertson; Stephanie Tate; and Emilie Zickel
Initial Considerations
This chapter provides detailed recommendations to guide your inclusion of accessible image-based content. This chapter will be particularly useful to those who teach in a field such as science or engineering where instruction is heavily image-based.
For a brief “quick-start guide” to image accessibility and alt text, please refer to the subsection on Functional Images and Alt Text under Considerations for Visual Access in Chapter One: Before Writing.
Images as They Apply to Accessibility
Images are non-text elements that include photographs, illustrations, diagrams, pictures, charts, graphs, and maps.
File types used: GIF, JPG, PNG
Identify Purpose
Before you can determine what to do to make an image accessible, you must identify its purpose or value to your document. Consider the following questions:
- Does your image serve a functional purpose? In other words, is it conveying non-text content to students? If so, you should:
- Does your image serve more of a decorative purpose? In other words, is it primarily a design element that does not convey content? If so, you should:
- avoid unnecessary text descriptions
Identify Audience
This work supports students who:
- Are blind or have low vision
- Have poor contrast vision
- Are color blind and cannot differentiate between certain colors
- Use a device with a monochrome display
- Use a print copy that is in black and white
- Have limited Internet access and cannot download images
- Have a form of cognitive disability
How to Proceed
Determine the role of each image used in content as either functional or decorative. Once that has been decided, select how each image will meet accessibility needs by providing descriptive text in a variety of ways. Figures, such as charts and graphs that rely on color to convey information, should also be evaluated for accessibility by students who are unable to distinguish between or see color. Please download and use the free tool Color Contrast Analyzer to check to see if you have enough contrast between colors.[1] Color Contrast Analyzer will also show you what colors look like to people with various color blindness, or deficiencies in detecting red, green, or blue light.
Functional Images
Consider what your content page would look like if the images didn’t load. Now try writing alternative text for each image that would work as a replacement and provide the same information as the image.
Three ways to provide alternative text descriptions for images include the following approaches:
- Describe the image in the surrounding text.
- Describe the image in the alt tag.
- Create and link to a long description of the image.
As you work on developing your alternative text descriptions, keep the following recommendations and guidelines in mind:
- Remember that alt text must convey the content and functionality of an image and is rarely a literal description of the image (e.g., “photo of a cat”). Rather than providing what the image looks like, alternative text should convey the content of the image and what it does. [3]
- For relatively simple images (e.g., photographs, illustrations), try to keep your text descriptions short. You should aim to create a brief alternative (one or two short sentences) that is an accurate and concise equivalent to the information in the image.
- For more complex images (e.g., detailed charts, graphs, maps), you will need to provide more than a one- or two-sentence description to ensure all users will benefit from the content or context you intend to provide.
- Avoid redundancy of content in your alternative description. Don’t repeat information that already appears in text adjacent to the image.
Descriptions in the Surrounding Text
You can use the surrounding text to provide the same information as conveyed by the image. This is often the best option for complex images because it makes the information available for everyone, not just those using the alt tags.
If you are editing someone else’s work for accessibility, you are probably not at liberty to start adding to the main text. However, if you are the author, this is the best and easiest option.
If an image has been adequately described in the surrounding text, you can either provide a few-word description of the image in the alt tag or follow the procedures for decorative images.
Alt Text in Metadata
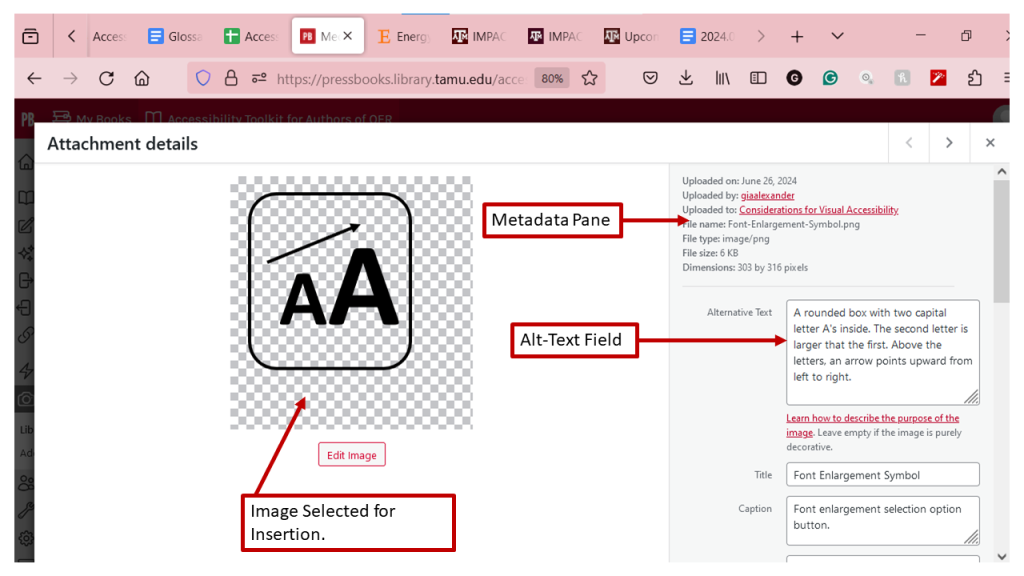
When a screen reader encounters an image, it will read the alt text, a detailed description of the image, that you add to its metadata when you first insert it. When a screen reader encounters an image without alt text, it simply says “Image” or “graphic.” Of course, this is not helpful. Therefore, many software packages, including Microsoft products, will not allow you to complete image insertion until you populate the alt text field in the metadata. Here’s an example of what that looks like.
Alt text needs to be more detailed than the caption. Here are some best practices for writing helpful alt text:
- At the beginning of your alt text, instead of writing “Image of . . . ,” state the type of image, i.e., a box, a screenshot, a diagram, a schematic, etc.
- Describe the layout of the elements in the image, typically working from top left to bottom right.
- Explain and interpret any crucial data in the image that you want your student to understand. A best practice for composing this text is to imagine that you are describing the image and interpreting its data over the phone to someone who does not have access to it.
- (Optional, if applicable) Include information on the best way for students who have low vision to view the image. For example, you might write, “This image is best viewed at a screen resolution of 760 x 1024.”
Please resist the temptation to leave the alt text for later. We all have good intentions, but research shows that missing or inadequate alt text is the most common accessibility barrier in instructional materials.
Long Descriptions
Complex images, especially charts or graphs, will often require descriptions longer descriptions, and it may not always be possible to add an explanation to the surrounding text. In this case, you can provide a link to a longer image description or an accessible table. One way to do this is to create a section for long descriptions in your resource and use links to allow people to easily switch between the image and its description and back again.
How to Create Accessible Images in Microsoft Products
This section uses an example worksheet/handout to show you how to make your images accessible in Microsoft products.
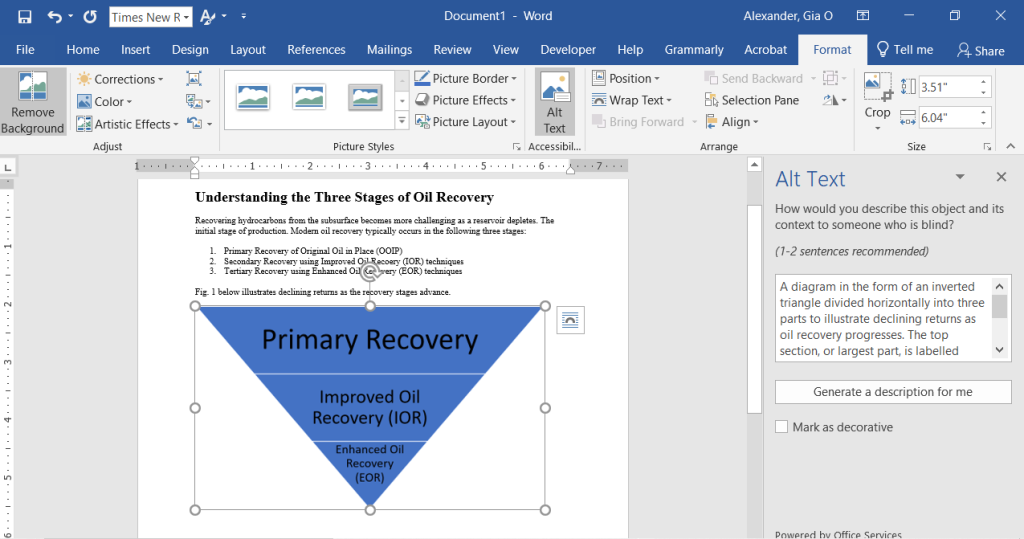
Microsoft Word
- Choose and insert your image.
- Right-click on the image and navigate down to Edit Alt Text in the menu that appears.
- Type alt text in the box that appears in the pane on the right-hand side of your screen, like this:
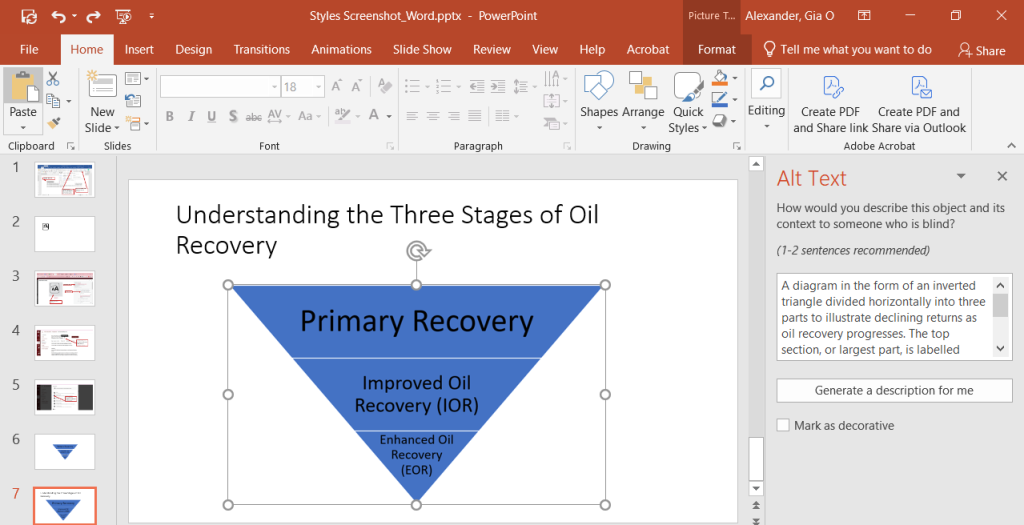
Microsoft PowerPoint
- Choose and insert your image.
- Right-click on the image and navigate down to Edit Alt Text in the menu that appears.
- Type alt text in the box that appears in the pane on the right-hand side of your screen, like this:
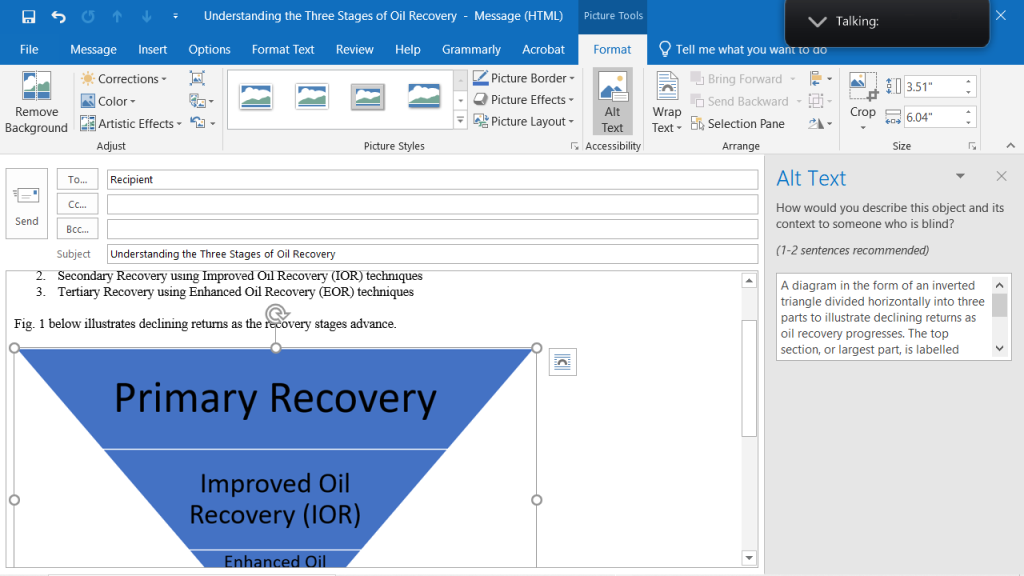
Microsoft Outlook
- Choose and insert your image.
- Right-click on the image and navigate down to Edit Alt Text in the menu that appears.
- Type alt text in the box that appears in the pane on the right-hand side of your screen, like this:
A Note about Using AI-generated Alt Text and Tagging Decorative Images in Microsoft Products
Note in the above figures that Microsoft products offer you two options to generate alt text via AI or to mark the image as decorative. Although you can try the auto-generation option, please go back and edit/proofread the generated alt text for accuracy and adequacy according to the alt text writing best practices discussed above.
Even though you may mark decorative images as such, it is a courtesy to your audience to still add some descriptive alt text, such as “Decorative image of a green check mark.”
How to Create Accessible Images in Google Products
This section uses an example worksheet/handout to show you how to make your images accessible in Google products.
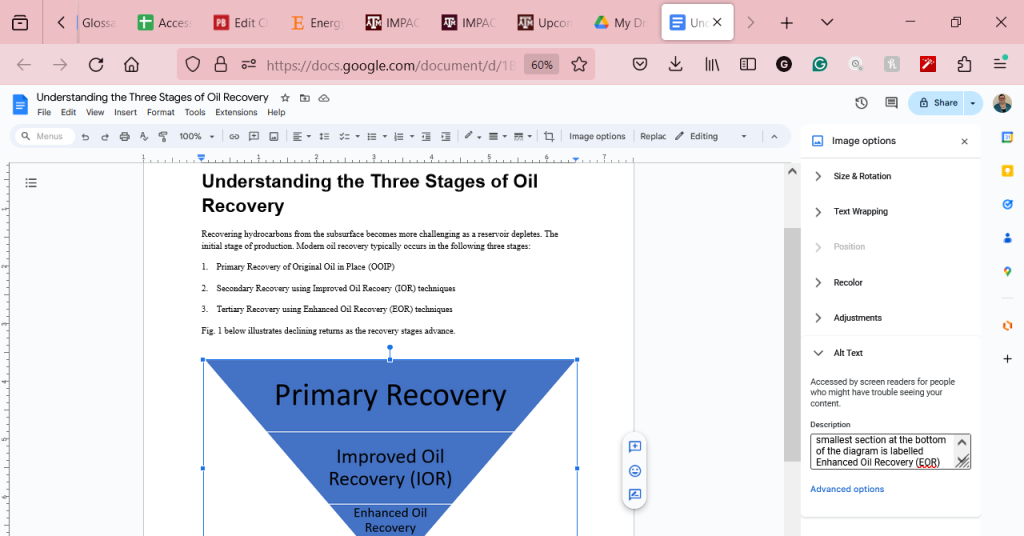
Google Docs
- Choose and insert your image.
- Right-click on the image and navigate down to Alt Text in the menu that appears.
- Type alt text in the box that appears in the pane on the right-hand side of your screen, like this:
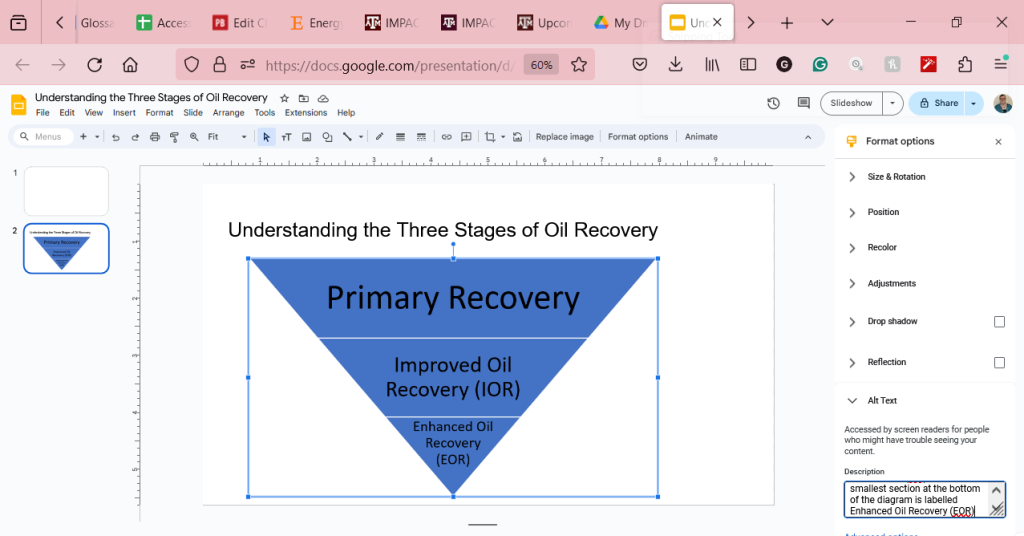
Google Slides
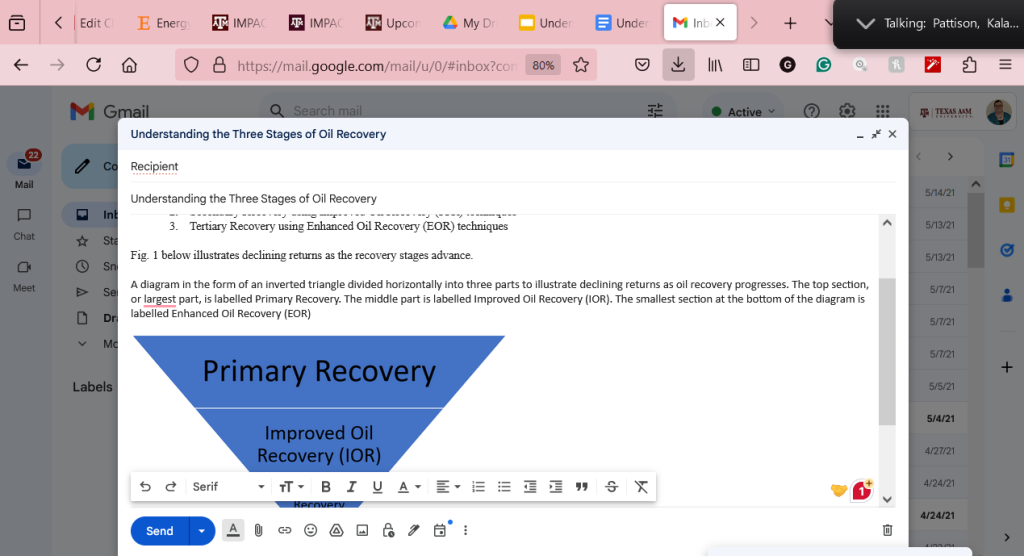
Gmail
- Choose and insert your image.
- Gmail does not offer the affordance to insert alt text in metadata. Therefore, revert to describing in the surrounding text by typing your alt text above the image. Place the alt text above the image because a screen reader will simply say “Image,” which might cause the audience to think that the alt text has been omitted. Your message should look like this:
How to Create Accessible Images in PDFs
For instructional design purposes, we typically do not create images directly in a PDF. Rather, we create them in whatever program we use initially to develop the document, such as Word or PowerPoint, and then save a copy of that document as a PDF. Current conversion to PDF from Microsoft or Google products usually preserves the accessibility features we have incorporated into the original document, such as the heading/tagging structure and alt text. Therefore, a best practice to ensure image accessibility in a PDF means first ensuring it in the original document before conversion. Be sure to run an accessibility check on the original document before saving it as a PDF.
But that’s not all. After converting a document to PDF, be sure to also validate accessibility in the PDF itself. Please see the section on PDF accessibility validation.
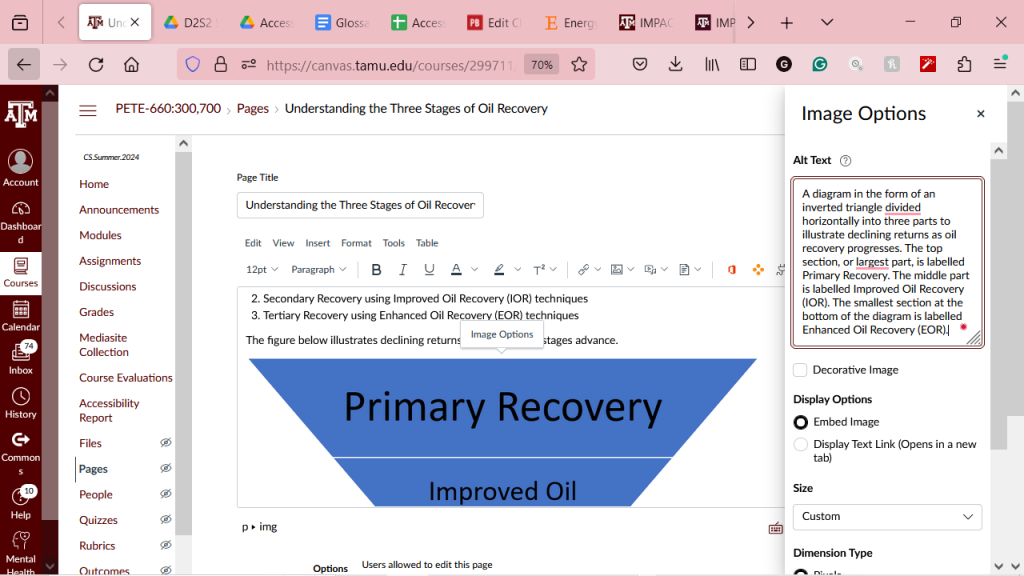
How to Create Accessible Images in Canvas
This section uses an example worksheet/handout to show you how to make your images accessible in the Canvas Learning Management System (LMS).
- Choose and insert your image.
- Left-click on the image and then again on Image Options (will appear in a small box above your image.
- Type alt text in the box that appears at the top of the pane on the right-hand side of your screen, like this:
How to Use Alt Text Tags When Coding Web-Based Documents
An alt tag refers to the alt attribute (alt is short for alternative) within an IMG tag. All images uploaded into Pressbooks have an alt tag, but for them to be useful, you need to insert an image description.
Alt tags are used in two cases:
- When an image doesn’t download due slow Internet, the alt tag content will display instead of the image.
- For people who are visually impaired and use screen readers, when a screen reader finds an image, it will read out the content of the alt tag.
Alt tags should be no longer than 125 characters, including spaces and punctuation.[4] This is because when a screen reader finds an image, it will say “Graphic” before reading out the alt tag. If the alt tag is longer than 125 characters, the screen reader will interrupt the flow of text and say “Graphic” again, before continuing to read out the alt tag. This can be confusing. For images that require descriptions longer than 125 characters, see the section on long descriptions.
To edit an image’s alt tag in Pressbooks, click on the image and select the “pencil” icon (edit). Under image details, there will be two textboxes: one titled “Caption” and one titled “Alternative Text.” The “Caption” box contains the image’s caption, which appears under the image in the visual editor. The “Alternative Text” box is where you describe the image.
This text was derived from
Loomis, Barbara, Heather Caprette, Stephanie Tate, Emilie Zickel, and Amanda Goodsett. Accessibility Toolkit for Authors of OER. Cleveland, OH: Pressbooks@MSL, 2023. https://pressbooks.ulib.csuohio.edu/accessibilitytoolkit/. Licensed under a Creative Commons Attribution-NonCommercial 4.0 International License.
Media Attributions
- Screenshot of the AltText Metadata Pane feature of Pressbooks, June 26, 2024.
- Screenshot of the Alt Text feature of Microsoft Word 365 edition, July 10, 2024.
- Screenshot of the Alt Text feature of Microsoft PowerPoint 365 edition, July 10, 2024.
- Screenshot of the Alt Text feature of Microsoft Outlook 365 edition, July 17, 2024.
- Screenshot of the Alt Text feature in Google Docs, July 10, 2024.
- Screenshot of the Alt Text feature in Google Sheets, July 10, 2024.
- Screenshot of the Alt Text feature in Gmail, July 17, 2024.
- Screenshot of the Alt Text feature in Canvas, July 10, 2024.
- TPGi, "Colour Contrast Analyzer (CCA)", accessed 11 August 2024, https://www.tpgi.com/color-contrast-checker/. ↵
Learning Management System such as Canvas, Blackboard, Moodle, or Google Classroom which is intended to host and communicate teaching materials, student work, and grades for courses.
